
A photography enthusiast asked me today morning, which is the right ISO to use? Her question was simple enough but a complete answer was not going to be that simple. For her sake, I told her to use the lowest ISO that she could manage with her desired combination of shutter-speed and aperture. The reality is not so simple.

(Sunset at Natadol – ISO 1100 set automatically by the camera)
A quick recap – What is ISO?
How quickly or slowly the image is captured by the film or sensor is its sensitivity. This is denoted by ISO (same as the earlier ASA for films). With high ISOs, the amount of light required to capture an image is lower. Due to chemical limitations in film and electronic limitations in sensors, usually, the lowest available ISO generally gives the best results when used in a good light. As the ISO is increased, the film grains or the sensor noise starts becoming prominent. (For the basics, do see this – Basics of Exposure)
So, during the film days, the answer was what I had told her. The lowest ISO meant nice colors, high dynamic range (the brightest and the darkest areas, the film could successfully capture) and low noise. For clicking a daytime scene, 100 ISO or less was the standard. So as to use faster shutter speeds and low ISO films, manufacturers churned out faster and faster lenses. The usual kit lens used to be a prime with an aperture of f/1.8 unlike the present-day kit lenses (zoom) with apertures of f/3.5 or slower.
Low ISO comes with its own challenges. For using low ISOs in regular light conditions, either the shutter has to be opened for a longer duration or the aperture has to be kept wide open and usually both. Not desirable in many cases and definitely not an option in some photographs.

(Nikon Df with Zeiss 135mm lens at f/5.6, 1/160 sec shutter speed, 1000 ISO determined by the camera while using aperture priority and -1 EV compensation)
Native ISO
In present-day cameras, things are not as simple as I had told to that girl. The best ISO is not the lowest. Let us first dive into the way camera sensors work so as to understand these intricacies. A sensor captures the light and converts it into electrical signals. For the amount of light that falls on the sensor, the electrical signals it can generate are fixed. For increasing the sensitivity of the sensor, this electrical signal is boosted by the camera electronics. For reducing sensitivity, the same signal is attenuated. So, the ISO for the digital camera is also fixed as with the film roles. Yes, it does not change! What changes with change in ISO setting is how the camera increases or decreases the amount of signal being provided by the sensor. This fixed ISO is called the ‘native ISO’ in the cameras.
Native ISO is the one and only ISO where noise generated is minimal. When the sensor manufacturing started and the research was in its initial stages, the sensors required a lot of light to generate usable amounts of electrical signals. The native ISO was therefore very low. In most earlier DSLRs, the lowest ISO was usually the native ISO.
So, why did increasing the ISO cause noise? For a simple reason that when the signal was boosted, it also boosted the artifacts and added its own noise created by the camera electronics, heat and what not!
If you are using an old DSLR, the lowest ISO will most probably be the best ISO to use.
Raising the native ISOs
With extensive research going on, companies were able to manufacture sensors that needed a far lower amounts of light than some years before to generate a reasonable amount of electrical power. The native ISO, therefore, got raised. So instead of a sensor which operated the best at 100 ISO, the manufacturers came out with sensor that worked best at 200 ISO. That’s one complete stop faster! So the 400 ISO theoretically had as much noise as its predecessor had at 200. The higher ISOs started to become less noisy. This was further combined with circuit designs and computer algorithms that reduced the noise.
What about the lower ISOs in these sensors? Well, they did not become noisy. Reducing the signal to achieve lower ISOs is not hard on the camera and so this can be done without generating too much of noise. Cameras with 200 ISO as native can easily do 100 ISO.
The raising of the native or base ISOs was disruptive for the photography world.
The insanely high ISOs become possible
The camera manufacturers kept on improving and now the native ISOs in most cameras rest somewhere in the middle of available ISO range. These cameras have a range of ISO where the noise is not different from other ISOs. The new age term is ‘ISO-Invariance’. The ISO invariant cameras have made photography really easy.
One addition that happened around the time when ISO-invariance started coming up has been the Auto-ISO. Now ISO can be changed by the camera itself. This has simplified things for many new users and thankfully the image quality does not suffer much. (Auto ISO)
What is your native ISO?
Use this method to find the ISO that gives the least amount of noise – Shift to manual mode and mount the camera on a tripod. Use raw images for this test. Now set a sharp aperture for your lens and a shutter-speed which gives you a slightly underexposed image. Capture one shot. Next, raise the ISO by one stop and capture another image without changing anything else. Keep on doing it all across the ISO range without bothering about overexposure. Now, open these raw files on your post-processing software and set all the exposures to the same level by sliding (or typing) the exposure compensation or exposure adjustment. Compare the noise in all the images. Give special attention to dark areas and ones with red hue. The photograph with the least noise is the one captured at native ISO for your camera. (Reason for capturing some underexposed shots initially was to be able to equalize all exposure in your post-processing software. Decide this based on the range of Exposure Compensation/ Adjustment, your post-processing software can handle)
The reason for adjusting the exposure? If for example in manual mode at f/1.8 and 1/60 second, the camera determines the exposure to be correct with 100 ISO then that particular combination will be well exposed. When you go on increasing ISO for the test to 6400, that’s about 6 stops of over-exposure. Everything will be practically white. It’ll be difficult to observe any noise in that image. So, the exposure has to be adjusted back.
I did this test on some of my cameras with these settings – f/8 aperture, 1/30 sec exposure, the subject was a wall-paper and the camera was mounted on a tripod. Started with the test at 50 ISO, then 100, then 200 and so on. 200 ISO gave me seemingly correct exposure and beyond that, the photograph started to become over-exposed. I went all the way to 6400 ISO. In post-processing, I reduced the exposure to equivalent of 200 ISO for all these. In one of the cameras, the least noisy ISO was 400, another one was 200 and in a new camera, it was 3200!
Some people say that you should not under-expose for this test. I also agree with that especially if your post-processing software can handle a large range of exposure adjustments. Start with the lowest ISO and set your shutter speed and aperture, then go on increasing the ISO without changing anything else.
Some cameras have a so-called native ISO range. Although the native ISO is one, the results from the above test do not show any difference over a range of ISOs. The sensor and electronics are so well made that the differences hide away in regular usage. For the geek-heads in you, still, the native ISO will be one and only one. Ask the camera manufacturer if they can provide that data.
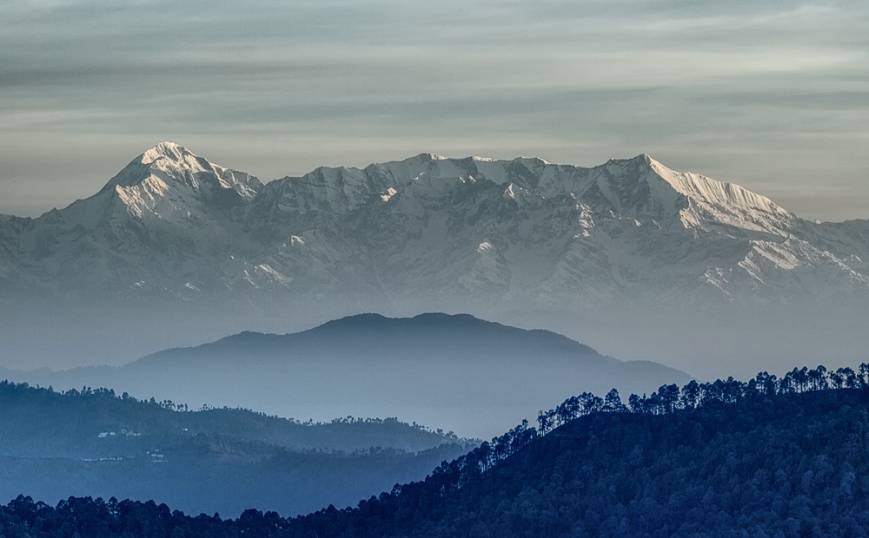
(Snow-covered peaks from Natadol, ISO 100 gave the best dynamic range)
The best ISO is still the lowest for landscapes
In old cameras with low native ISOs, this statement makes sense but what about new cameras with high native ISOs? When the camera captures the raw file at low ISO, the electrical signal is attenuated. This does not increase the noise as much as when boosting the signal. So, noise is not that big a problem. There is yet another factor that I have noticed – when the lower ISOs are used, the dynamic range somehow appears more. Even cameras with high native ISOs provide better colors and more shadow and highlight details at low ISOs. Forget the native ISOs and stick with the low ISOs for landscapes.
Native ISOs work wonders with star-trails and night photography
Here the colors are not a problem. Dynamic range is also not a pressing factor. What is required here is the lowest possible noise. Native ISO works well here, especially when combined with over-exposure or exposures to the right of the histogram. Do read this – Star Trails
Combining multiple images to reduce some elements?
Creating a photograph of a monument without any public? Go for the high native ISO of your new camera. The noise will further get reduced when the computer algorithms will remove the elements that are not common across images.
Mid level ISOs for birding, action, and macro
Choose ISOs between your camera’s native ISO and lowest ISO for most of these shots. The simple method for choosing should be to first choose the shutter speed and aperture and then an ISO based on those settings and the available light. Let the camera do the calculations. I prefer to set Auto-ISO on new cameras with the higher limit of the function set close to the native ISO. All I have to do then is to play around with what’s important (shutter speed and aperture) and the camera takes care of the ISO.
Going above and below native ISO – A word of advice from mystics?
Another simple thing to observe so as to keep your noise low. This seems like a word of advice from mystics. I have not tried it and so I can’t vouch for it. Once you have determined or found out the native ISO of your camera, increase the ISO in complete stops (doubling it). This tends to keep to noise lower than when the increments are not done in complete stops.
If your camera’s native ISO is 800, the 1600 ISO (double of 800 or one stop up) will give lower noise than 1100 ISO. This has something to do with how the signal is amplified by the camera.
For cameras that exhibit a native ISO range, find out the true native ISO (which is just a single ISO) and use that.

(Chain and Ring – ISO 560 as determined by the camera)
What the future holds
Is it not obvious? I expect to see spectacular performances by new sensors so much so that the ISO setting may just be removed from the cameras. Imagine cameras where there is no ISO documented. All you have to do is set whatever shutter speed or aperture you want to and the camera will always remain on auto-ISO. A professional camera of the future will have just three modes – manual, aperture priority and shutter-priority. An exposure compensation dial will be there renamed as ‘darken/brighten’ the image and that’s it! No built-in flashes either.
These sensors will have the ability to see where our eyes with complete dark adaptation will also fail to see.
A word of caution – I am not an engineer hired by any camera company and the information that I have provided here has been presented in a manner that is easy to understand (and may not be completely technically sound).


