
There is an unseen world in small details waiting to be discovered. Going close and photographing these small details is what makes macro photography special. There are different definitions for macro photography. Macro photography is generally termed as photographs that are taken at close proximity to the subject in a manner that the scene in front of the lens being captured is of the same size as the sensor. The lens has to focus really close for this.

(Flower bud photographed with Sigma 105mm macro EX DG lens mounted on a Nikon D200 body, f/8, 1/250 sec at ISO 100)
There are some ways to focus really close. For macro photography one or more of these options are required.
Increasing the distance of lens from camera
There are specialized extension tubes available which go in between the lens and camera. These increase the distance of the lens from the camera and thereby help the lens focus on close objects. The extension tubes available in the market vary from simple spacers to advanced accessories with complete electronic control of compatible lenses. Apart from extension tubes there are bellows available which also permit tilt and shift movements apart from providing variable distance adjustment from the camera. This is the least expensive method to get macro ability without spoiling the image quality.
The problem with all these extension tubes and bellows is that the lens looses the ability to focus further away when they are mounted in this manner. The second problem is that every time macro focusing is required, the lens has to be removed and mounted back along with the extension tubes or bellows.
Adding plus power to the lens
This is another inexpensive option which is also very easy to use. There are macro filters available which are nothing but a bunch of plus power simple lenses in a filter mount. These can be screwed onto any lens like any other filter. Once the macro filter (plus power lens) has been screwed onto the camera lens, the lens starts focusing on nearby objects. Depending on the power of the macro filter used, the ability to focus close varies.
The main disadvantage is the drop in image quality due to added optical surface. Most of the inexpensive macro filters induce a lot of chromatic aberration too. These filters also restrict the distant focusing ability when they are mounted.
Mounting the lens after reversing
This was an old method which is still being used. A camera lens is mounted by reversing it and using a special reversal ring (adapter). The rear part of the lens that usually gets attached to the camera now faces the object. There is slight drop in image quality due to change in way the light hits the optical elements but still the image quality is better than using a macro filter.
The rear part of the lenses is usually not very well protected from dust. There are chances of dust entering the lens if this method is used in not too clean environment. I feel very uncomfortable with the thought of exposing the rear element of my lens so I do not recommend it.
Freelensing
I am not even sure if this should be mentioned here but some iron-nerved photographers with least respect for camera use this method as well. This is done by keeping the lens unattached to the camera body and then clicking a photograph if the camera permits it.
Apart from the obvious operational difficulty, this is a sure shot way of getting dust on the sensor. Avoid it at all costs, no matter how keen you might be on trying this out.
Macro lens (micro lens)
There are dedicated lenses available that are able to focus from infinity to very very close. These are true macro lenses. For some reason, Nikon calls these lenses as micro. When it comes to serious macro work, a dedicated macro lens is the best option. They provide the best image quality with no serious limitations in terms of usability. The only factor to consider is the focal length. Anything below 100mm on a 35mm film / sensor camera are not good. The working distance for such lenses is too less and sometimes the hood might even disturb the subject. One should ideally buy the longest macro lens that the pocket permits. I use a Nikkor 105mm micro AI-s f/2.8 lens mostly for macro work. (Micro Nikkor 105mm f/2.8 AI-s). Save money by not opting for optical stabilization/ vibration reduction since most of the movement in macro photograph happens to and from the subject and this axis of movement is not covered by these stabilizers.

The world of macro photography
There are interesting compositions and beautiful photographs to be made in macro. Photographers who do macro photography click flowers, insects, droplets and everything that catches their fancy. The best part about macro photography is that there are thousands of subjects everywhere. Each and everything exhibits an entirely different look when seen closely. A simple flower becomes a beautiful composition of pollens placed in Fibonacci spiral. A scary wasp can be seen as a lifeforms trying to hide itself from humans. Everything gets a new dimension.

(Wasp photographed with Sigma 105mm macro EX DG lens mounted on Nikon D200)
Once you are ready with your equipment of choice, here are some tips to get you going in macro photography –
Use small apertures – As the focusing distance diminishes, the depth of field also reduces. It is very important keep the main subject in focus. Apertures like f/16, f/22 or even smaller are required at times and still the background remains blurred.
Keep camera steady – Small apertures mean slow shutter speeds (if ISO is to remain unchanged). Slow shutter speeds lead to camera shake while clicking. Ideal is to use a tripod where available. If not, use a monopod or some kind of bracing. VR is rarely useful in macro since most of the movement that can cause blurring occurs to and from the subject rather than lateral. This does not mean that lateral movement does not occur. It also happens but the impact on the photograph is not as much as is by the to and from movement from the subject. AF-C or servo AF can sometimes help in case of to and from movement. (Camera Shake – How to avoid it?)
Long focal lengths – Macro involves going real close and if you are photographing insects, they can feel scared and fly away or even attack in self-protection. Keeping enough distance helps. This is one of the reasons why I always suggest long focal lengths for macro work.
Focus Stacking – Sometimes even the small apertures like f/22 fail to get everything in focus. Focus stacking can be very helpful in such situations provided the subject is stationary. This is a technique of clicking multiple photographs of the same subject with minor changes in focus and then overlaying them on each other to create a final picture with the required sharpness. There are specialized focusing rails (macro rails) available that shift the camera in small increments for clicking multiple photographs. I have found these rails useless. The best way to click multiple photographs for focus stacking is to shift the focus manually in minute steps and then create a focus-stacked image.
Ring flashes – Lens mounted flash are good in low light conditions but be careful with the reflections. Sometimes these can create very unsightly reflections which can be hard to correct in post-processing.
Manual focus – When using the camera hand held, if you are not using AF-C or servo AF to reduce camera movement, switch to manual mode. It is easier to focus manually and then fine focus by moving the camera towards or away from the subject. There’s no need to adjust the focus ring. Slight movement as described here can correct the focus. (Staying Focused). If you feel that you are swaying excessively towards and away from the subject, do try out AF-C or servo AF. This can help instead of optical stabilization. My recommendation is to use manual focus if you can.
Clear filter – Use a clear filter while doing macro photography with a dedicated macro lens or while using extension tubes. Sometimes the front element can get really close to objects and get dirty. There was an incident where I was photographing a small ‘Spotted butterfly’ (the one in photograph below). It was sitting on a leaf in a patch of tall weeds. While reaching out to the butterfly, the front of my lens touched some of the weeds which incidentally snapped and left behind a milky substance on the filter. Thankfully I was able to clean the filter though with a lot of effort though the coating was gone in the areas where that milky substance had touched the filter. Without a filter, the front element of my lens would have been stained. (To use a clear filter or not?)
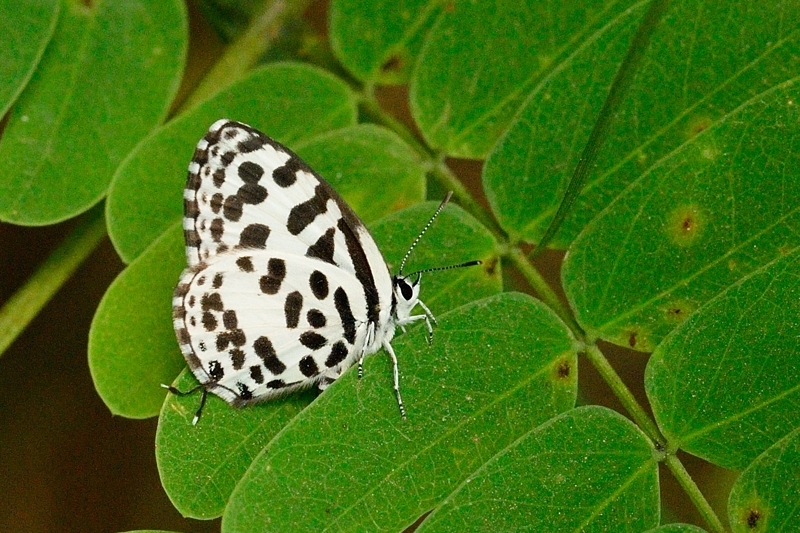
(Spotted Butterfly)
