
Lately, whenever I check out any photography groups, I always end up seeing many bird photographs. With the easy availability of cost-effective and sharp long-teles, this is now within reach of many. Everyone who had a passion for bird photography is now able to indulge in that. Get an advanced camera, mount a telephoto lens, switch to auto and start clicking! That’s what most photographers clicking birds do. Sounds easy, does it not?

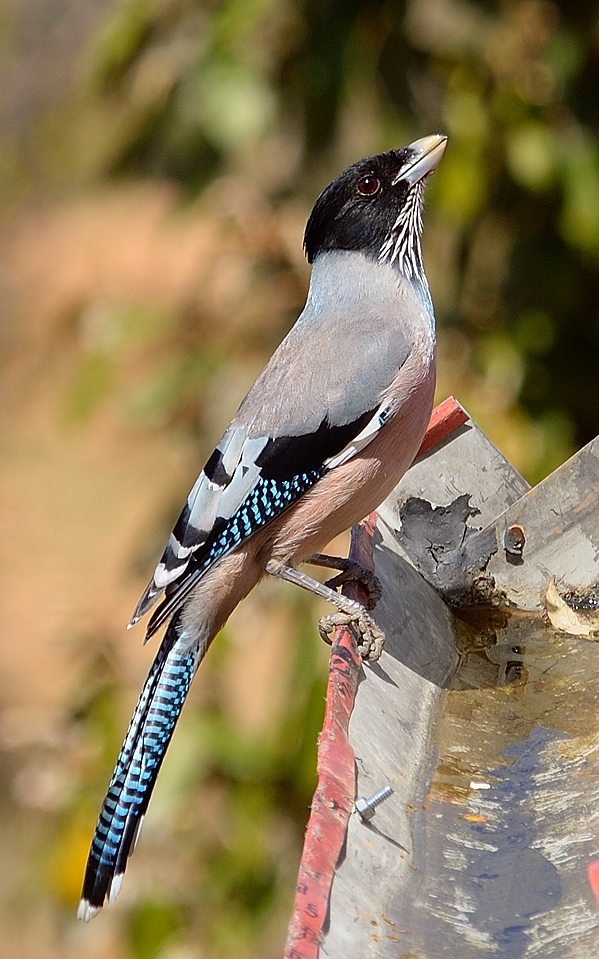
(Black-headed Jay on Rhododendron – Nikon Df with Sigma 150-500 on manual focus mode. Photographed at Natadol, Uttarakhand)
Birding vs Bird Photography
Observing birds and understanding what they do, how they live is birding. People who indulge in birding in a serious manner are called Ornithologists. One of the most famous names in the birding scene in India was Salim Ali.
Birders carry binoculars or monoscopes and are usually armed with a field guide to identify various birds and observe them.
Bird photographers on the other hand love to photograph birds though sometimes the knowledge may not match that of the birders. Bird photographers usually carry cameras with superzooms or DSLRS with long telephoto lenses. From what I have observed, most bird photographers use focal lengths between 300mm and all the way upto 600mm on APS-C sized sensor bodies.
However, with the easy availability of photography equipment most birders also now indulge in photography and similarly with easy availability of field guides and increased awareness, the bird photographers are learning more and more about the birds. The difference is greying out now!
… and no I am not a birder, just a photographer who occasionally indulges in bird photography when I have good company (somehow that sounds like my alcohol drinking statement)
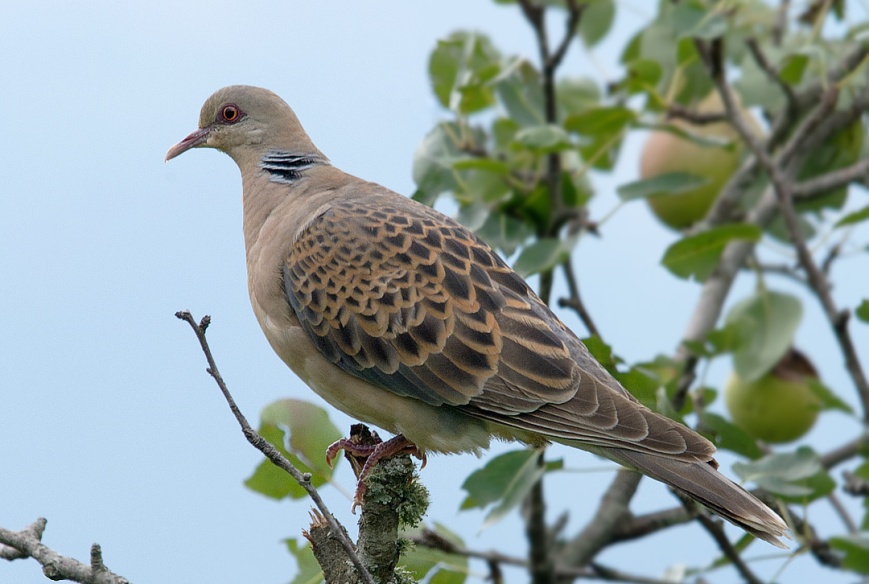
(Turtle Dove – Easily spotted and very docile. It lets people approach quite close before flying away.)
Technical tips for photographing birds –
Sure, using a camera with excellent high ISO noise performance is easy, but for a technically sound photograph of birds, there’s more –
- I use aperture priority mode (Camera modes (PSAM and more)) with Auto-ISO setting (Auto ISO). The reason is that I use old Nikon manual focusing lenses and a long inexpensive Sigma lens. Having a slightly deeper depth of field helps me hide minor focusing errors. After all, tele lenses have a paper-thin plane of focus.
- However, when I am following birds in their flight, I shift to shutter priority. This prevents inadvertent camera shake. I do not go below the recommended ‘1/focal length’ shutter speed. More so, since I am also not used to holding the Sigma lens which I have with me. If you feel your hands shaky, especially with the long end of your lens, do opt for still higher shutter speeds.
- Manual Mode with Auto ISO is ideal if you want to use the lens in the sweet range of its sharpness (usually the middle few f-stops) and a fixed shutter speed. This is what I do when I feel tired after a long trek and find my hands shaky.
- Expose to the right side of the histogram (ETTR). I usually use a +1 EV compensation while doing birding. Any over-exposure can be corrected in post-processing. This helps in reducing high ISO noise (interestingly, by going still higher up in the ISO. I will write about it someday).
- Avoid chimping (To Chimp or Not To). Too much of chimping can lead to missed shots. I have seen experienced bird photographers sitting in one post with their eye glued to the viewfinder for the complete duration a bird is in their view. Do however preview your images for exposure and other settings. I identified my mistake after just a few shots.
- Learn to use hyperfocal distance and manual focusing. AF-C is good but sometimes predictive focusing and focusing using hyperfocal distance is beneficial. I am more of a manual-focus guy so I use this often.
- Switch to back-button autofocusing. This permits the right thumb to autofocus and the index finger release the shutter. Doing so ensures that the focus doesn’t hunt around at the critical movement of pressing the shutter release.
- Practice panning. Smooth panning with correctly chosen shutter speed will give the results most photographers yearn for (Panning).
- Armed with memory cards, the number of shots is no longer a limitation. Use continuous shooting modes (also called burst modes). Yes, the shutter count goes up and also the resale value of your camera goes down, but then did you buy the camera just to resell it? Forget the shutter count and use burst modes. However, don’t go overboard. I have seen photographers clicking hundreds of pics, at their highest frame rate, of a single composition, which I doubt will ever be useful.
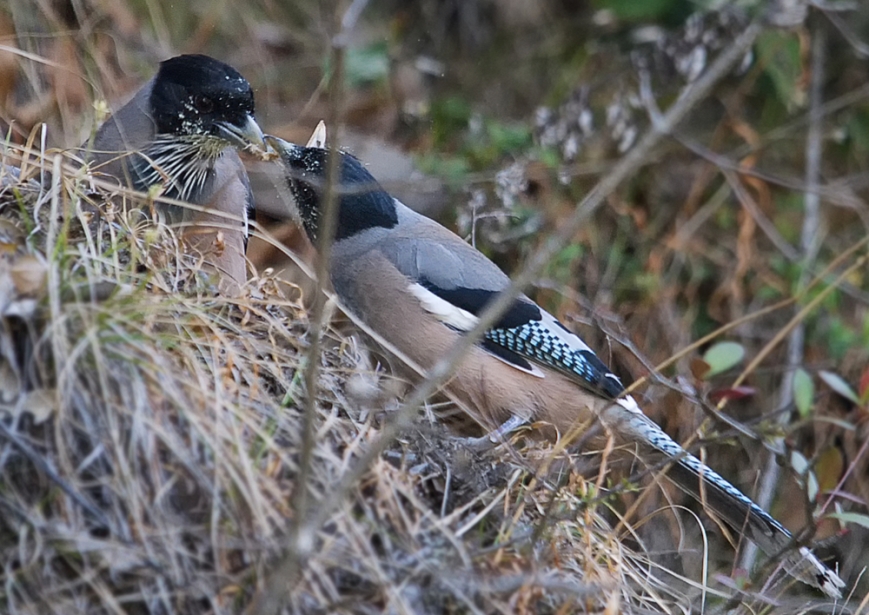
(One Black-headed Jay sharing its food with another one – activities like these are intriguing. Instead of photographing birds sitting on a perch, this is what bird photographers should be aiming at.
A request – I am not a bird photographer, so please consider that when you comment on the poor quality of my bird photographs)
Tips for excelling in bird photography –
The other day, I was told that to photograph large predator birds, I should try on a sunny day and around noon time. Reason – it is hard for their prey to see them against the bright sun in the background.
Another successful photographer told me to watch out for my shadow also. Sometimes my approach would be subtle but with slanting light, my tall shadow would move fast enough to scare the bird away.
Here are some more tips for excelling in bird photography –
- Become a birder. Learn about their habits
- Learn to identify the birds. One of the persons who were with me could identify the birds by their call itself.
- Walk slowly and quietly. Learning to approach them without scaring is a bigger asset than having a fast long lens. Learning to get close also reduces the amount of atmospheric dust or haze that exists between the bird and your camera.
- Capturing birds in action is more attractive than birds quietly perched. Learning about their habits helps in this.
- Do not shoot birds in flight when they are high up or against the sun. The undersides are usually not as beautiful as their upper body and against the light, the photographs lack the required punch.
- Try to capture the catchlight in their eyes. Make this an unwritten rule. Due to the way their eyes are placed, catchlights are easy with birds. Just a little turn or tilt of the head and the catchlight will appear.
- If a part of bird is hidden behind something, try to include that hidden area too. That ‘feel’ of the bird being completely there in the frame, even when not completely visible, is easy on the mind.
- Birds that are lit by filtered light falling from a side, photograph the best. The side light brings out textures.
- Pay attention to the background. The birds should stand out from their background. A clean distraction-free (and if possible darker than the bird) background shifts interest to the bird.
- Do not disturb their habitat in any way.
- Do not disturb the birds either. If they do not want to fly, don’t scare them into flying. No loud music, no shouting… in fact – no talking itself!
- Try to include contrasting elements in the composition like flowers, different colored leaves etc.
- Many photographs will turn out blurred or not too good. Don’t be disheartened. Birds are fast-moving creatures and so blurred, out of focus or wrong depth of field images are common. Just don’t delete them while photographing. Do so on your computer.
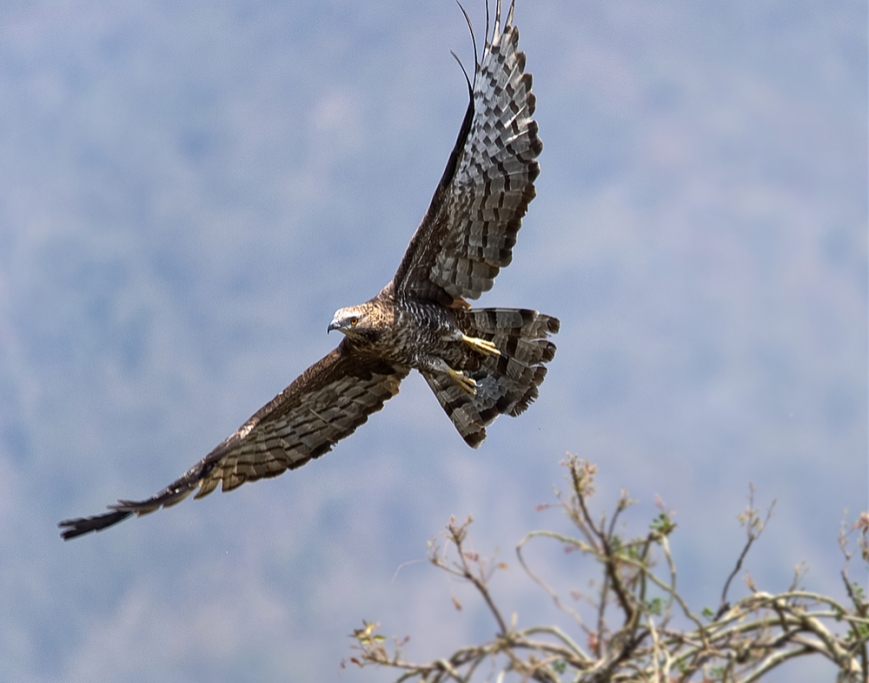
(Oriental Honey Buzzard – Birds in flight can be tricky to capture. Trick is to not zoom in extensively and then crop at a later stage. Predictive focusing, hyper-distance focusing or continuous/tracking autofocus helps)
Some good field guides to consider –
- Birds of Indian Subcontinent – Carol Inskipp, Richard Grimmett, Tim Inskipp. (Recommended by Sudipto Roy, the same avid birder and bird photographer who helped me in identifying the birds in this article. The electronic version of this book also has bird calls for easy identification)
- A Field Guide to the Birds of India – Krys Kazmierczak (Illustrated by Ber Van Perlo)
- The Book of Indian Birds – Salim Ali (The general opinion it that this is a little outdated but still good for identifying the birds)
Some thoughts about binoculars (EDIT 1, Thanks to Tracy) –
Binoculars are the easiest option to enjoy birding. Here are some pointers to buying and using them –
- Good optics cost money! (Same as with camera lenses)
- 8×42 is the power that I use. In layman terms, ‘8’ designates the amount of magnification (higher the element, more the magnification) and ’42’ is the size of the optical element (higher the number, brighter will be the image).
- Very high magnifications make tracking the bird difficult and with very low magnifications the birds are not clearly observed. Bright binoculars are heavier and more expensive than not so bright ones.
- For initial adjustment – close the eye cup that has diopter correction and focus on a stationary object using the other eyepiece and using the center focusing ring. Once in focus, cover this eye-piece and focus the other one using only the diopter correction. Now leave the diopter correction as it is and enjoy your binoculars. Use both the eye-pieces and center focusing ring only.
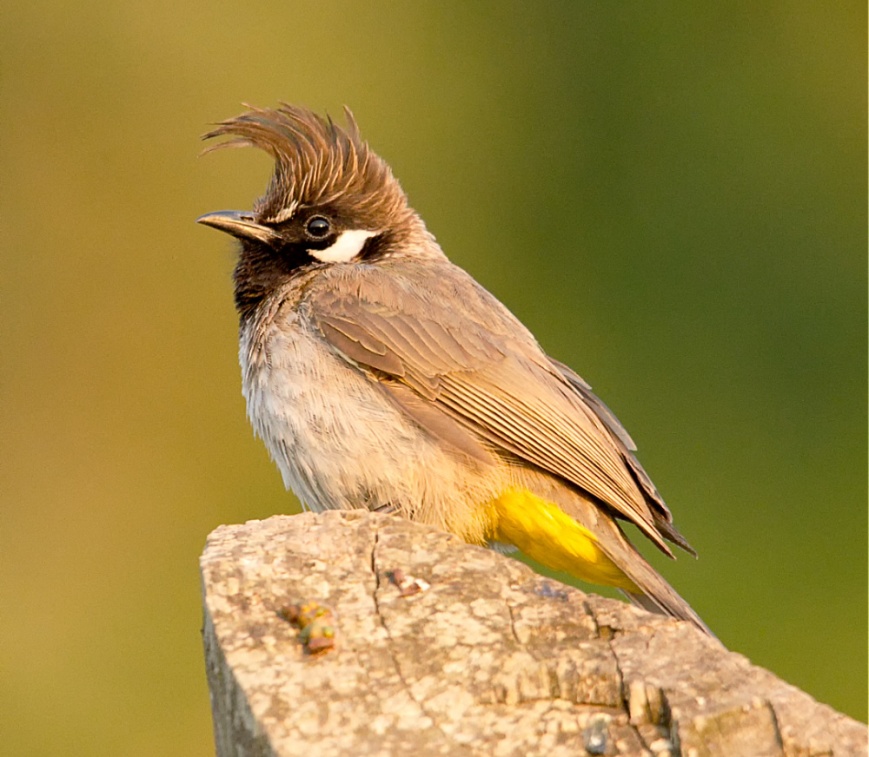
(Yellow-vented Himalayan Bulbul, photographed at Natadol.)
Where to photograph birds in Uttarakhand?
Just step outside of your house and you’ll start seeing them. You don’t have to travel to special locations to photograph them. Keep a feeder, a water bath and hand a birdhouse… and you might find them even in your backyard! This is applicable to any part of India. Yes, even in the most crowded cities!
Coming back to Uttarakhand, there are places which are well known for their birds and some places which are not known to many but frequented by birders. Here are a few of them (in Uttarakhand) –
- Binsar region
- Nandhaur Wildlife Sanctuary
- Natadol village area (Birds of Natadol) – My family has a homestay here!
- Neel Dhara Bird Sanctuary
- Pangot region
- Sattal lake region (avoid the popular ‘hides’ or studio-setups, if you want to actually enjoy birding)
- … and all the national parks from the state
Some of these places have artificially created places to attract birds which at times can be harmful too. If there are bird-feeders installed, avoid that place. These feeders have the potential to harm the birds (by way of infections and making them lose their natural food-finding abilities) and by visiting such places you are promoting the use of such feeders. Similarly, do not visit places that have artificial perches and invite hordes of photographers. Imagine each photographer having almost similar frames. Not something which I would love!

(Shirke – another cute little bird, a photograph of which required a lot of cropping. Notice the catchlight in the eye and texture of feathers.)
And remember –
- Be very very quiet, don’t disturb the birds.
- Be extra careful during the breeding season of the birds.
- Do not handle eggs or young or try to climb trees just to peep into their nests.
- Don’t litter around. Carry all your waste back with you in a cloth packet. (Plastic makes noise and scares the birds away)
- Groups of 4-5 serious people or less are recommended.
Things to be wary of and avoid these –
Birding and bird photography are gaining a lot of popularity lately. So, it is natural that there are people out there ready to make a quick buck. If you happen to indulge in bird photography, please avoid these places-
- Avoid any place that has a permanent ‘hide’ and ‘perch’. These places provide an ideal studio kind of set-up but at the cost of birds’ health. The owners lure the birds by using bird-seeds, fruits etc. Usually, these stale foods are a cause of disease in birds and end up killing them. As responsible bird-photographer, avoid such ready to go to hides and perches.
- Avoid photographing birds that are nesting. Don’t even make them nervous by staring. If you feel that there is a nest, avoid that place. Let the bird be in peace.
- Also, avoid photographing any captive birds. By doing so you are expressing your happiness and consent for keeping that bird in captivity. (Yes, there are birds in captivity in large zoos and places which care of them, but I am more concerned about the birds in captivity that are caught and sold to be kept as personal pets).
Another very important resource – Bird-Photography : The Ethical Way!
Time and Season?
Birds can be found all round the year and at all times of the day. However, there are some times which are more favorable. Most birds are quite active in the early morning hours, when they wake up and go out looking for food. Since other disturbances are less, these can be observed in their natural behaviors. When the sun is high up, it is a good time to catch large predatory birds. In cold places, going late in the afternoon for birding is also fruitful.
For most places in India, I recommend early springtime. The birds are quite active and the trees are still not covered with dense foliage. When the trees get covered with dense foliage, it is hard to spot them.
(Birdie on roof – I can’t help it if these are common in my region and being a big bird they are easily captured by beginners in this field, like me.)
Photographing birds is easy, especially with the superb cameras with their high ISO performances and a new breed of inexpensive telephoto lenses. Most people on social media platforms with long teles, claim themselves to be ‘bird photographers’. Photographing birds is easy, just point the camera and click… but bird photography is not! Those social media sensations with their captures of birds are not ‘bird photographers’. That requires becoming a birder first!
So, grab your camera, get hold of a field guide and become a birder as well as a bird photographer!
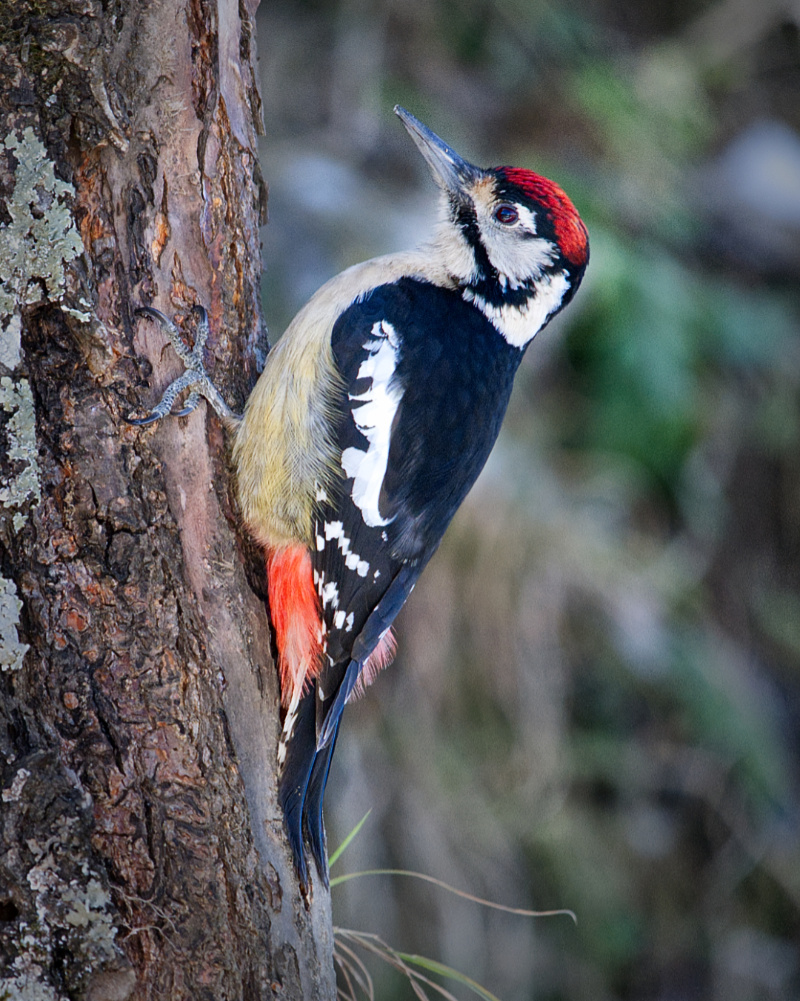
(Himalayan Woodpecker, spotted on an old wild apricot tree)
Further Reading:
Bird-Photography : The Ethical Way!
Camouflage
Tricks to using long teles
Photographing butterflies

Great post 😁
LikeLike
They are great bird photos for someone who is not a bird photographer. Thank you for the tips. A bird that stands out from its background must exist in some kind of bird nirvana. I am a beginner birder (twitcher as we call them in Oz) and a beginner bird photographer. Funnily enough, I have never been able to master binoculars. With a camera, a whole new world of birds has opened up to me. It is fabulous. I will have to check out some of your other articles. Kind regards. Tracy.
LikeLike
Thanks for your kind words. A lot of people have told me that binoculars are difficult to use. What I have observed is that the difficulty is related to choosing the correct binoculars and then adjusting them.
I’m editing the above article to include some basics about binoculars too, even though it is not related to photography.
LikeLiked by 1 person
Thank you. I will visit again and read your binocular tips too.
LikeLike