
“Beyond the blue horizon, Waits a beautiful day, Goodbye to things that bore me, Joy is waiting for me” …
Horizons add depth to landscapes. They show how vast the scene is in the photograph. Though horizons end up being a part of most landscape photographs and of various other genres too, very rarely do photographers give any special attention to it. The photographers should realize that the horizon is actually a very strong line in the composition.
I consider the horizon as a straight line dividing the distant visible end of land and the sky. For a good horizon, here are a few pointers to make it look really good –

(Dry branches on a beach at low tide – Nikon Df with Zeiss 25mm lens at f/7.1, 1/160 sec, ISO 100. The distant horizon with a line of white surf adds depth to the photograph)
Keep it straight
Horizons are horizontal. Even a degree of tilt can be distracting to our minds and can reduce the impact of the photographs. Horizons are supposed to be straight and that is how our minds expect them to be seen. So first and foremost, get them perfectly horizontal while composing. With time, your subconscious will start taking care of this, but in the initial days, I always suggest people make a conscious effort to get the horizon straight. Some cameras have built-in leveling devices to get it right, in some others, the focusing screen has framing lines that can be used as a reference. Whatever composition aid you use, get the horizons right. I try to align my horizons to the edges of the frame.
There are specialized spirit levels also available in the market that attach to the hotshoe of the camera but these are useless. I mostly see the image in front of me using the optical viewfinder. Anything outside the viewfinder and its display are not visible to me at the time of clicking the shutter release, and definitely not the spirit level on the hotshoe. With tripods, the alignment is easy. The horizon can be placed perfectly using the visual clues in the photograph. View the whole frame and not just the subject or the main element while composing your photographs.
Shutter Release
This has to be smooth and without any jerk. Do not jab at the shutter release. It has to be a gentle press. A wrong way to press the shutter release button is a sure-shot way to get the horizons tilted and also end up with an inadvertent camera shake. While I press the shutter release button, I know exactly when the trigger is going to get engaged. With mechanical cameras, the shutter release required effort but with the present-day digital cameras, the shutter release buttons are very very responsive. I do not recommend screw-on shutter release buttons that are sold for Leicas and other similar cameras, those are a waste of money. Instead, every photographer should practice the correct way to press the button, without any additional aids.
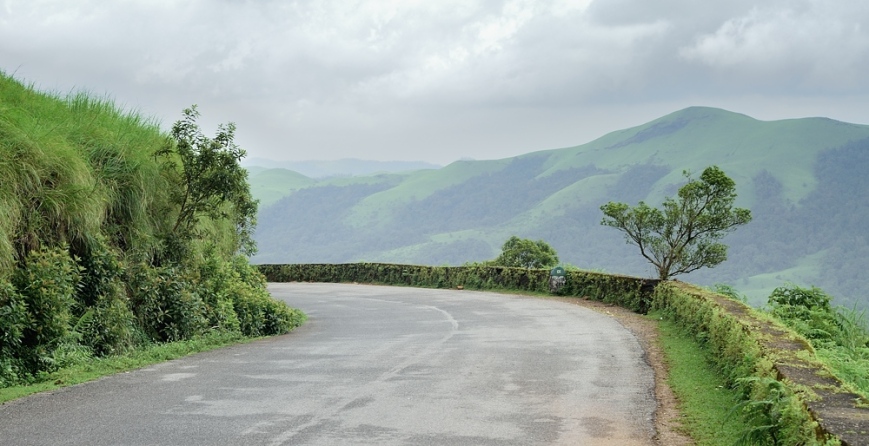
(Hill Road – The horizon is hidden by the hills and low cover of clouds. Nikon D200 with Nikkor 50mm f/1.8 D lens. f/5.6, 1/60 sec at 100 ISO)
Graduated ND Filters
Many scenes have light values (exposure value) ranges going well outside the sensitivity of the camera sensor or film. Graduated ND filters are very useful in such scenarios. For a realistic-looking horizon, I recommend tilting the ND filter a little. The demarcation of the graduation should not be parallel to the horizon. Even the tilt should be in a manner that the lighter end of the horizon gets the lighter portion of the graduated filter. This maintains the natural look. (For more on ND filters – Neutral Density Filters)
Placing the horizon in the photograph
Midway placement in the photograph is a no-no in most cases. As I have mentioned earlier, the horizon is a very strong line in most compositions, and it should not divide the frame into two exact halves. This is stressful to look at. Though at times this is exactly what may be required. Use your own imagination and decide on what you want to show in your photograph. For landscapes, an easy starting point is keeping the horizon at the top third portion of the frame. I like to consider the whole composition and then place the horizon in a manner that the horizon balances out the placement of elements. For photographs where the sky or a tall structure is making up the main subject, the horizon will have to be placed in the lower part of the frame. Rule of thirds (Composition Rules – Part I) is a good starting point but learn to step out of it little by little and compose as you feel is right.
Horizon is not visible
Yet another challenge comes up when there is no obvious horizon in any part of the frame. This is quite common in deep forests (natural green forests or cement jungles alike) and hilly regions. A little tilt is not very obvious in such locations but the vertical elements in the photographs do provide clues. Trees, grass, and even buildings can give these clues. So even if the horizon is not visible, try to maintain it straight based on the clues provided by other elements in the composition.
I remembered an interesting phenomenon in the absence of a clear horizon and other visual clues. Near Leh in Ladakh, India, there is a hill road that has been nicknamed Magnetic Hill. The layout of the area and surrounding slopes creates an optical illusion that the downhill road is actually an uphill road. Objects and cars on the hill may appear to roll “uphill” in defiance of gravity when they are, in fact, rolling downhill.
So if the horizon is not visible and there are no obvious visual clues, then compose your images as you feel fit.

(Horizon is not a part of the composition in this photograph)
To include or exclude horizon
Horizons give a sense of completeness to the photographs. Include them in the landscapes wherever possible. Tilting the camera down to focus on a primary element where the horizon is just left out of the frame creates disturbing photographs. The balance of such a photograph does not appear to be pleasing to our minds. Photograph, where the horizon is well out of the frame is comparatively a better option. Include the horizon when it seems to have been just left out of the frame boundaries.
Horizon as the main element
Not very often, but sometimes the horizon itself can be a very captivating subject. Silhouettes of simple elements all along the horizon make it very interesting.

(A simple sunset which looks good due to the distant silhouettes on the hills)

Very informative write up.. I never thought that horizons are so important. Easy to follow too.
LikeLike