
Infra-Red Photography is a very old technique of capturing near-IR spectrum of light. As is the case with many inventions, IR photography started out, of a very specific need during the war time. This need was to demarcate buildings and people from trees and other vegetation. What started as a technique to identify targets during war is now an art-form. In IR photography, the visible spectrum is mostly discarded and only the wavelengths from above 700 nm are used for photography. The results are very interesting, different and quite attractive to look at. Technically these wavelengths are near-Infrared but in photography this has come to be known as simply IR.
Advantages of IR photography
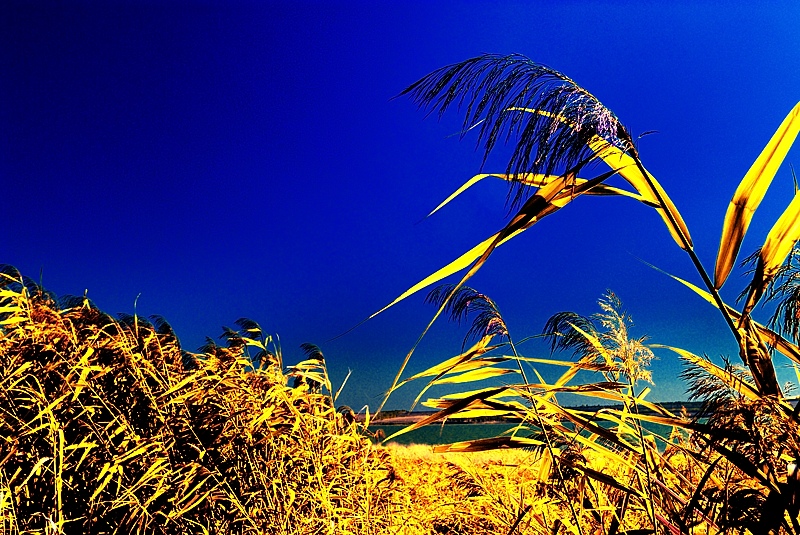
- Since it covers a narrow spectrum of wavelengths, the colors are depicted in a very different way.
- Everything looks different due to the change in the way, the wavelengths are captured.
- Haze and atmospheric dust is not captured and so the images are usually very sharp.
- Skin gets smoothened out and appears very soft.
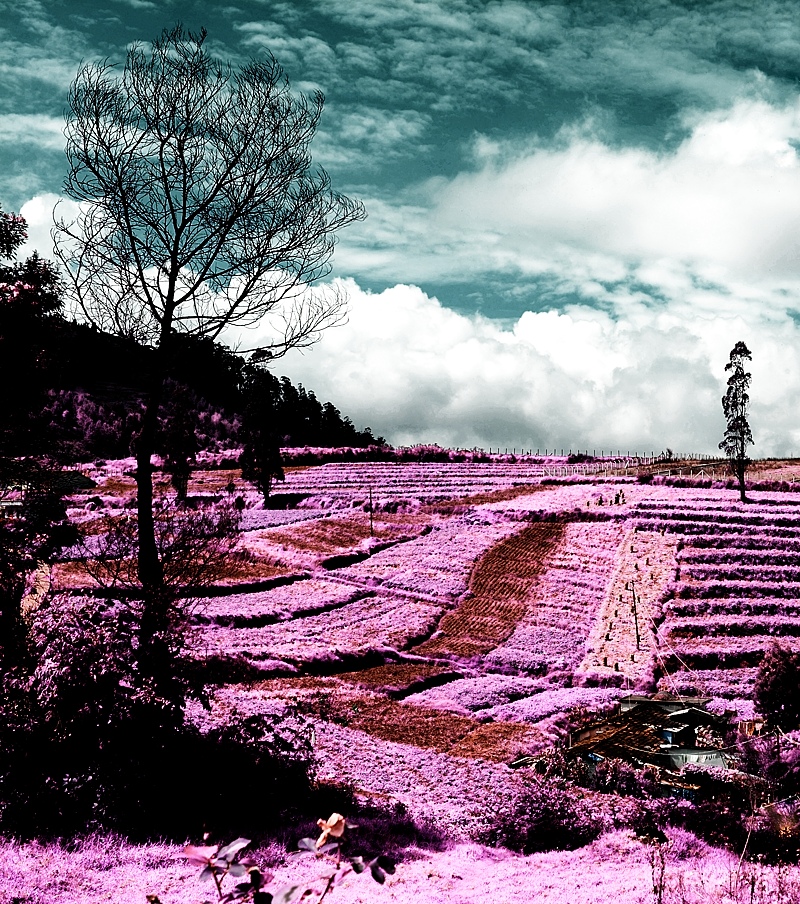
- Sky turns very dark and appears black on monochrome.
- Green leaves turn bright pink-white and on monochrome, they appear as white.
Equipment required
To start in IR photography there are various ways. The easiest is to buy a film camera and use dedicated IR films, either colored or black and white. I always prefer B&W films for IR photography. The results are usually very sharp images with high contrast which do not look very unnatural.
Another extreme is to buy a dedicated, super-expensive digital IR camera which again is not a very comfortable option for many.
A cost effective way is to convert any existing camera into IR sensitive by getting the IR filter in front of the sensor removed. This will void the camera warranty but convert the camera into IR sensitive. In fact, there are some digital cameras available from early digital days where the IR filter is present but its effect starts much beyond the near-IR spectrum we are interested in. These cameras can be used for IR photography without any changes. My favorite camera for IR photography is a converted Sigma SD14 camera. I had used it for sometime but presently I do not have it. (In case, anyone is selling a used model, do let me know).
Apart from the obvious requirement of IR capable camera or film, IR filters and a tripod are also required. More about these in the techniques below.
Get started with IR Photography
Due to the change in wavelength and intensity, IR behaves in a slightly different way. The IR waves are longer than visible light. The refraction of this range of wavelengths is different from visible spectrum. This leads to errors in focusing. In most earlier lenses, there were markings on the lens body indicating the IR equivalent focusing required in comparison to visible spectrum. With improvements in lens designs and introduction of apochromatic lens elements, this shift in focus has been almost removed. For IR photography, depending on the lens the focus may or may not have to be changed manually. Check the captured image on the preview screen at 100% zoom to confirm the focusing.
Use manual focus. This is for the sake of the reason stated above. Most of the auto-focus systems rely on techniques that bring about complete focus with the visible spectrum. Though in some recent DSLR cameras, the live-view mode with direct focusing can help but I still recommend using manual mode.
Though the IR films are sensitive to IR, they also react to light in the visible spectrum. Similarly the digital sensors are sensitive to visible light. To prevent the visible light from spoiling the photograph, IR filters have to be used. IR filter is a misnomer actually. These allow only IR light to pass through and prevent all the other wavelengths from passing. I recommend buying a Hoya R72 filter for venturing into IR photography. This particular filter permits wavelengths from 720nm to about 900nm, making it very easy to use in comparison to other IR filters that have a narrower range.
The IR filters are very dark and have high filter factors. Due to their darkness, the shutter-speeds required to capture a usable image are very low. Sometimes 30sec to 1 minute exposures are required in broad day light. To keep the camera stable during such long exposures, the camera has to be mounted on a tripod.
Darkness of IR filters also makes the focusing almost impossible. The only way out is to first focus the lens. Using a small aperture also helps by providing reasonably sharp depth of field even in case of minor focusing errors. make the required adjustment if required for IR photography and then screw on the IR filter.
Take a center weighted meter-reading before putting on the IR filter and then after screwing on the IR filter, adjust the shutter speed as per the filter factor. Metering through the IR filter is very inaccurate and so should not be relied on. Do check the captured image on the preview screen and adjust the exposure further using the histogram information.
Keep the camera cool by using an umbrella. This will reduce the long exposure noise that may creep in due to the sensor getting heated. Long exposure noise reduction should be used in case this is a problem.
While post-processing, the first reaction from the photographers is that all the images look pinkish or reddish in color. This is due to the IR filter. Convert photographs to black and white. This is my personal preference since I find the black and white IR photographs more realistic than the colored IR photographs. If you want to have colored IR photographs, correct the color cast first, and then post-process as per your own liking. You can try swapping colors or duo-tone effects.
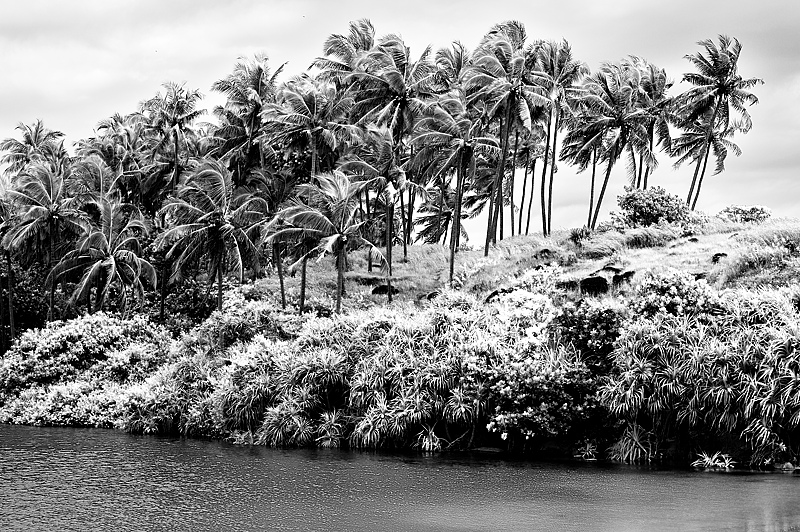
(Look at the vegetation near the waterbody which appear white. The sky would have been really dark but for the clouds. At the time of this photograph the sky was overcast.)
IR effect in post-processing
Some filters and plugins provide the option to produce IR effect in post-processing of normal light photographs. These use some of the basic characteristics of the IR photographs to produce the IR effect. These filters increase the contrast of the image, turn the reds and greens into white and blues into black. In case your photo-editor has IR conversion option, do play around with it but remember that true IR photographs are far more attractive and attention grabbing that the effects these filters can provide.
Disclaimer: Any alterations (as described in this article) to the camera will void the warranty and can irreversibly damage the camera so proceed at your own risk.

Nice, was waiting for this article!!
LikeLike
Informative like always.
LikeLike